

Image courtesy of http://www.queenslandhomes.com.au/the-reno-lads-toowoomba/
If you’ve been considering renovating but find the process daunting and don’t know where to begin, then this blog might be just for you! Whether it’s a kitchen upgrade, an extension or a whole house renovation, there are some logical steps to follow that will take some of the pain out of the renovation process. Knowing them will hopefully give you the confidence to begin!
1. Design
This is the fun bit! Designing new layouts, new interior schemes and room functions can be exciting, but it’s important to keep things like planning restrictions and budgets in mind during the design phase. Having an architect or draftsperson on board can really help make this process easier – they’ll have knowledge of what you can and can’t do in your local area, as well as a good idea of how to achieve what you’re after within budget. It’s important to be as final as you can with design decisions prior to commencement of works. This means avoiding costly changes and delays down the track, as well as less stress for everyone involved!
2. Get approvals
Depending on your locality, certain council approvals and certifications may be required before you can commence renovations or extensions on your home. Hopefully these have been taken into consideration during the design process. If you’ve hired an architect or draftsperson, they can submit plans for approval on your behalf.
3. Planning or staging works
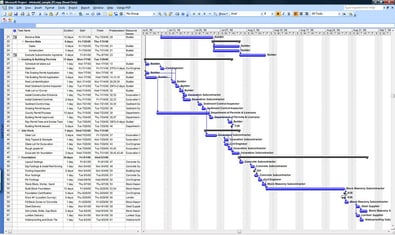
Planning is a critical stage in creating overall efficiency and project flow. If you’re planning on managing the project and the trades involved yourself, developing a checklist or gantt chart of what’s required and when can assist you in rolling out the process with greater efficiency to increase project flow.
The order of trades depends on the project at hand and the trades required to complete it, but generally follows this sequence:
- Demolition
- Clear and establish site
- Set out - surveyor
- Pipes and drains - plumber
- Foundation(footings, slabs, floor frames) work - carpenter/specialised trade (i.e. concretor)
- Waste pipes and other service pipes - plumber/electrician
- Flooring - carpenter
- Wall frames - carpenter
- Roof trusses – carpenter
- Windows and external door frames – carpenter
- Roof cladding and gutters – qualified roof plumber (That's where VPR comes in!)
- Walls – carpenter/bricklayer
- External works (doors, decks, stairs) – carpenter
- Wiring of services (electrical, communications, gas)
- Wet areas
- Internal linings – plasterer
- Joinery – carpenter
- Tiling – tiler
- Painting – painter
- Final plumbing works (taps, fittings wastes to basins etc.) – plumber
- Final electrical works (fitting switches, power points, wiring appliances)
- Ceiling insulation
As you can see, there’s a lot to organise! A great way to minimise stress and ensure you get the desired results within budget, is to contract a builder to oversee the project. It will be their responsibility to arrange each trade at the appropriate time and you can simply check in with them as the project progresses to ensure everything is on track.
4. Hire a builder
Once you’ve obtained approval from council you can send your plans out to builders (or specific trades) to quote on.
5. Appoint a certifier
Unless your architect or builder arranges this, you’ll need to appoint a certifier that will be responsible for checking that mandatory inspections are undertaken throughout the project.

6. Order PC items
PC items are ‘prime cost’ items such as sinks, toilet, taps, etc. Take note of availability and delivery times to ensure that they arrive on site at the appropriate times and don’t cause costly delays!
7. Check in with your builder
Throughout the project, it’s a good idea to check in at least once a week with the builder to ensure there are no hiccups.
8. Report defects
Upon completion, you will have a nominated amount of time to notify the builder of any unfinished items or defects. The builder will be obliged to rectify these defects according to your contract.

A little renovation inspiration - Before (image courtesy of http://www.queenslandhomes.com.au/the-reno-lads-toowoomba/)

After (image courtesy of http://www.queenslandhomes.com.au/the-reno-lads-toowoomba/)
Don't forget!
- Insurances
- Site security
If you’re hiring a builder, it’s their responsibility to take out the appropriate insurances on your behalf. For more information on this item, please refer to our blog post on QBCC Home Warranty Insurance.
We hope this blog has provided you with some useful information on planning your home renovations. If you have any further queries, please feel free to contact us via the comments box below, make an enquiry here or give our friendly team a call on
1800 476 634.
We'd be more than happy to help!
You can also get the process started by requesting roof replacement quote below:

Updated 13th Jan 2020 to provide most current information.